The Story of 'Awaiting Serendipity'
- tomadams3

- Jan 8, 2024
- 4 min read
In many ways, this piece is an exercise with different techniques, primarily the use of layers, which can then be peeled back at the final stage. I had to put aside trepidation and fear of failure, taking the plunge after a bit of an over-think. My main fear came from being a skinflint and not wanting to waste materials, but I figured I could always paint over the picture if I wasn’t pleased with it!
Rather than buy canvasses, I make up MDF boards and reinforce them with pine beading on the back. Then, I give them a couple of coats of mdf treatment to seal them. This prevents the oils from the board interfering with the paint. What follows is a blow by blow account of how the piece was constructed:
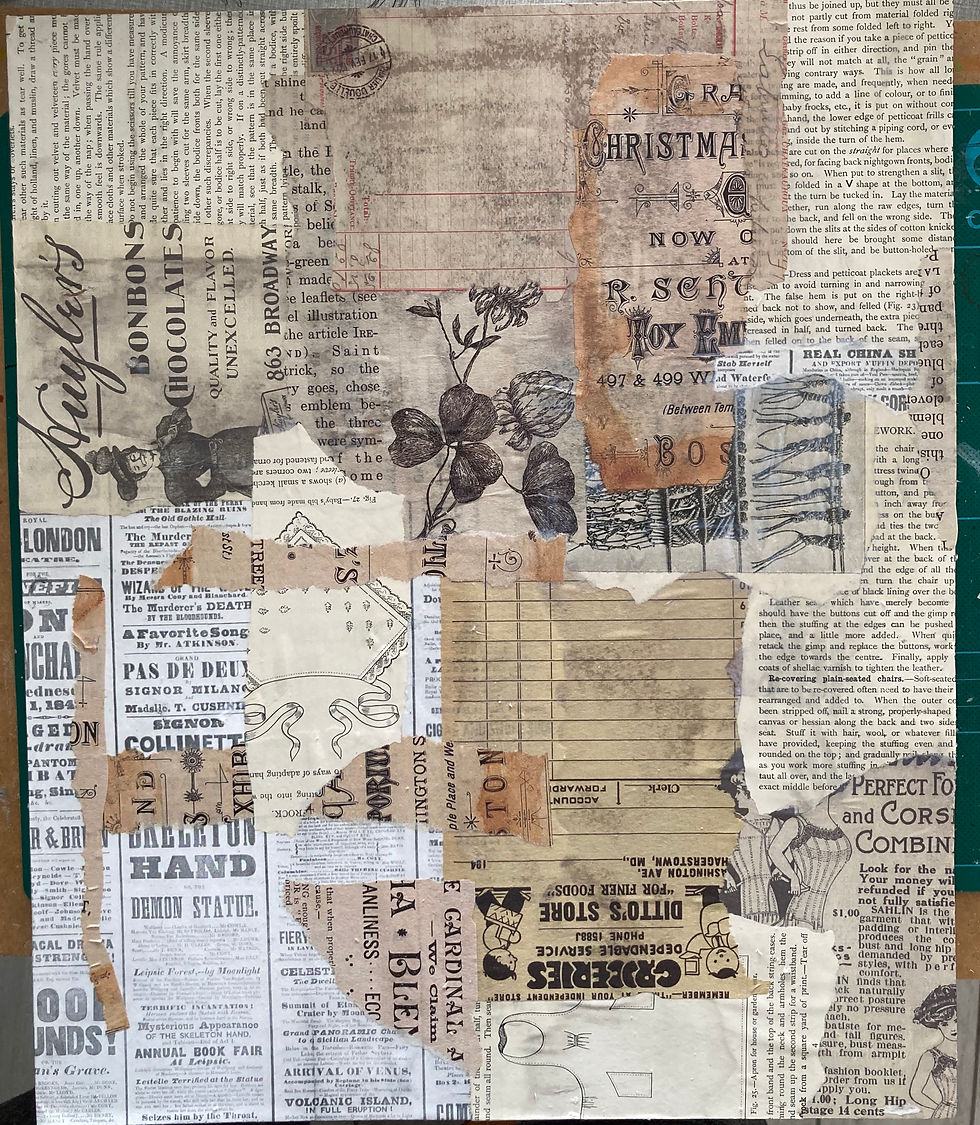
Stage 1: Collage pieces from old books and bought vintage papers are applied. This is stuck down with PVA glue and smoothed out with matt medium. This allows a separation between this and the next layer which (hopefully) will allow peeling later on.
Stage 2: A wash of burnt sienna acrylic ink is added to homogenise the vintage effect.

Stage 3: Apply a few judicious sprays of Tim Holz distress ink (honey) varying the height of the bottle to get different spray and droplet effects. It strikes me that I kinda like this as it stands, but I suppress the urge to finish it and push on to the next stage.

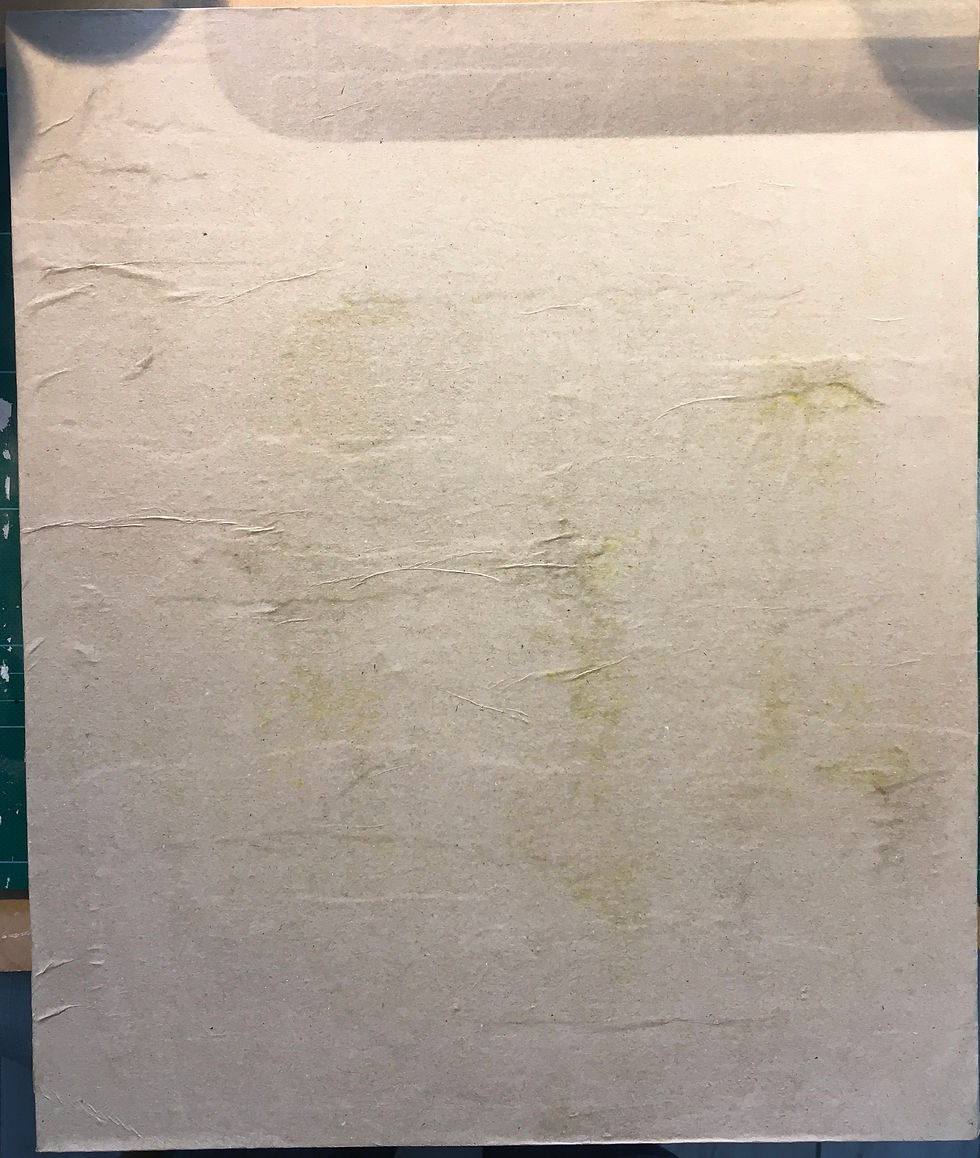
Stage 4: First Scary phase. I cover the previous work entirely with grey lining paper, then spray it with matt acrylic sealer.
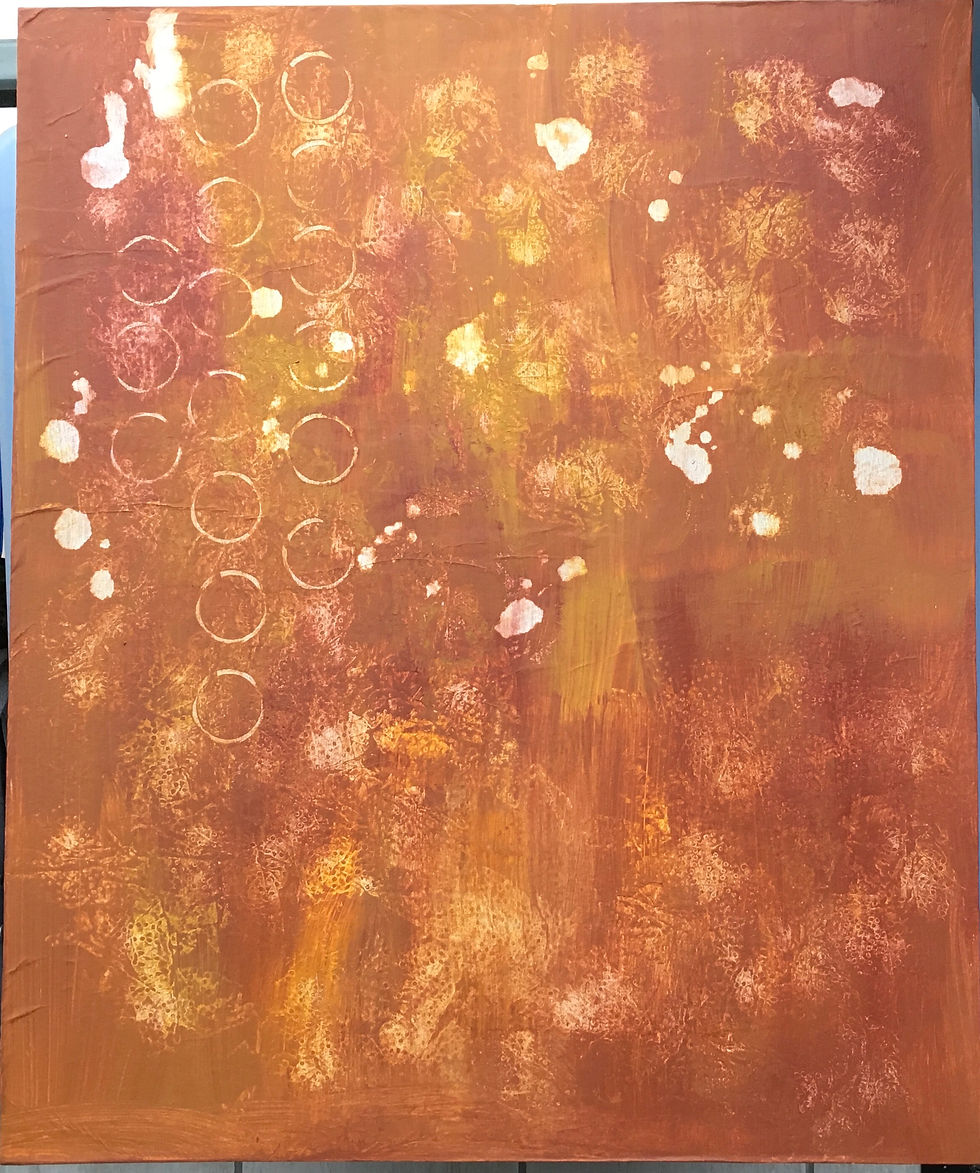
Stage 5: Apply a layer of white gesso with a large paintbrush.

Stage 6: Use a paintbrush to add a mix of yellow ochre and some kind of lightened up brown (It may have been burnt umber). This is then wiped back in places with a wet cloth and mopped with a kitchen towel. This also added some cool patterns. Paler droplet effects are achieved through ‘tonking’ and I employed a bit of mark making using a cardboard tube.
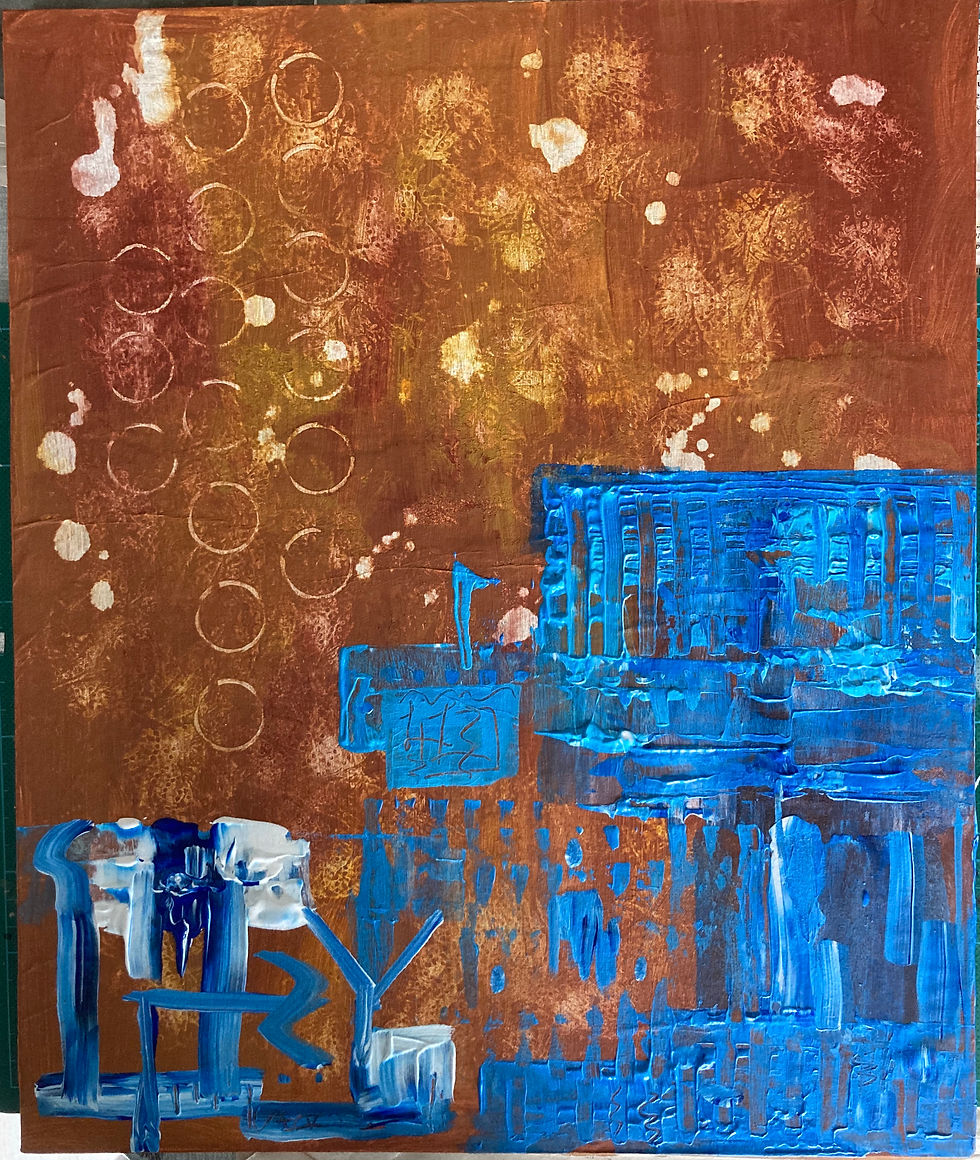
Stage 7: For contrast, apply a mix of pthalo blue, white and purple using a wedge and toothed plastic tool normally employed for applying tile adhesive.
Stage 8: Because I’m starting to feel apprehensive about whether the peeling will work, or whether it will just result in the whole lot coming off in scraps of unrecognisable paper, I experiment with a small portion. Voila - it works! I’m encouraged to push on.
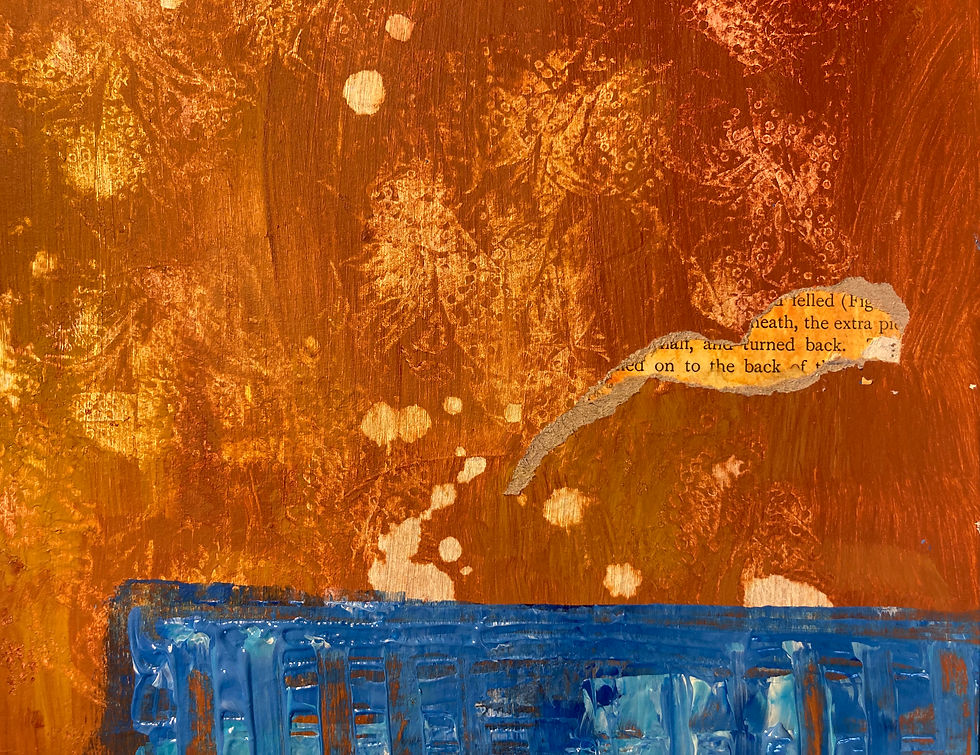
Stage 9: Next layer involves gluing down torn up sections of toilet roll wrapper over most of what I’ve done. I think I may have applied another sealing spray of acrylic matt at this stage, too. We subscribe to ‘Who Gives a Crap’ toilet roll delivery which is a sustainable source of paper based on bamboo. I’ve always liked the patterns on these and save them for gelli printing normally. This is all sealed and smoothed out with matt gel medium. I get the odd wrinkle, but don’t mind because it all adds to the effect I want.

Stage 10: Use of a window-wiping squeegee to apply a mix of titanium white, payne’s grey and cerullean blue. I don’t mix it up too much because I like the streaky effect.

Stage 11: The black stripes are achieved by using masking tape and applying the paint with a brayer. I found the best way to get the acrylic to sink into the slight depression produced by the tape was to roll this in vertically. (Tip: rub the sticky side of the tape briefly on your jumper. This prevents it adhering too much to the surface and the underlying paint lifting). The yellow ball is also applied with a brayer using a cut-out stencil from cardboard. Really liking the broken-up effect here. It was influenced by the artist, Petr Strnad. At this stage Helen says she doesn’t like the black and I’ve spoilt the piece.
Stage 12: Apply an ink abstract pattern to the ball/circle giving it a weird moon-like appearance. I also use water-soluble wax crayons with puddles of water to fill in the internal edges of some of the shapes. It’s difficult to make these out as it’s quite a subtle effect.

Stage 13: Paint on a bit of light green and employ ‘scraffito’. I also felt the black stripes needed a bit of definition so I used an old library card to edge them with white. I also apply white to the lower triangle as I’ve decided I don’t like the brown mush. Not so sure I like the light green at this stage either.

Stage 14: Finally, the moment of truth. I peel back various layers within the shapes to reveal what’s underneath. This is a process of discovery, finding out whether to peel right back to the original collage or one of the intervening layers. I experiment with peeling back the black stripes at the bottom, but decide I like them too much to completely break them up. This may or may not be a mistake because I’ve effectively covered up a large proportion of the previous layers. I also felt the circle needed more definition so I went round the outside with a light yellow. At this stage, after six and a half hour’s work (not all in one sitting) I declare the work ‘abandoned’. Is it finished? I don’t know. Maybe I’ve employed too many different techniques, but I can always return to it at a later date.

The Title: ‘Awaiting Serendipity’ describes my feelings of reaching for an equilibrium in the piece. Each layer found me liking major portions, but deciding to cover them up in the hope that the final reveal would produce something better. I also felt it summed up the suspended ball on the slope. Is it stationary or on a trajectory upwards or downwards? Maybe it can’t make up its mind either.


Comentários